

Evariny Ryani

Perempuan biasa yang belajar menyalurkan hobi.pecinta seni dan pengagum ilmu pengetahuan...

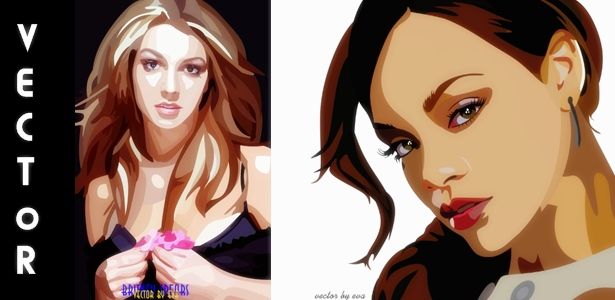
Vectors art

Kumpulan vector karya saya dan teman-teman,lengkap beserta tutorial.

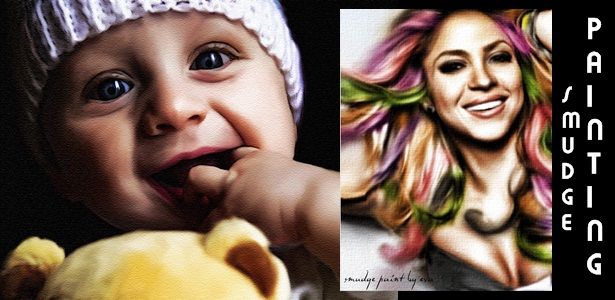
Smudge Paintings Art

kumpulan lukisan karya saya dan teman-teman,dengan berbagai metode,lengkap beserta tutorial.

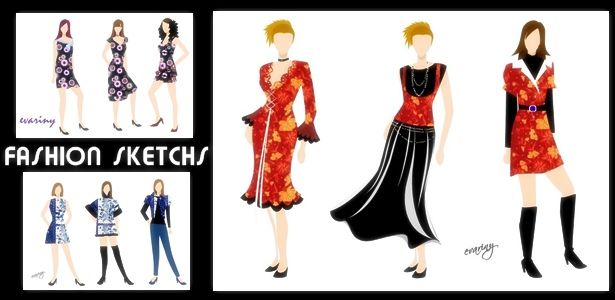
fashion Sketchs

Sketsa pakaian dan kaos-kaos distro karya saya,dilengkapi dengan aneka tips dalam berpakaian.

Games

Kumpulan games terbaik yang siap menghibur!

Tampilkan postingan dengan label tutorial photoshop in english. Tampilkan semua postingan

Sabtu, 19 Juni 2010

colour effect alpha channel


Preparations:

We will need an image of a model, prefably a close-up on the face. I’m using Keeley Hazell for this tutorial.

All rights of these resources belong to their respective owners.


Step 1 – Setting Up Background:

Create a document of size 750 by 550px and save it as example.psd.

Fill the background with #E6D4A7.


Step 2 – Create Strip Pattern:

Create a new document with 3 by 3px, then create a new layer above Background layer.

Select Pencil tool with 1px and color #000000, paint 3 dots as shown on the left. Delete the Background layer. Press Ctrl+A and go to Edit > Define Pattern. Close this document w/o saving.

In example.psd, create a new layer. Select Paint Bucket tool and fill in the pattern you created.


Step 3 – Transparent Rainbow:

Create a new layer above the rest. Select the Gradient tool and choose Transparent Rainbow.

Drag the gradient from top-left of the document diagonally across to the bottom-right.


Step 4 – Create a Color Frame:

Select the rainbow gradient layer and go to Filter > Blur > Gaussian Blur. Set the radius to 250.

Create a layer mask on this layer and fill the mask with #FFFFFF. Using Soft Brush tool of size 350px and color #000000, paint center of the mask as shown on left.


Step 5 – Selecting Image Channel:

Open up your model image and drag it into example.psd using Move tool.

Hide the rest of layers except for the model. Go to Channels tab and choose the brightess image out of the Red, Green and Blue (for mine is Red).


Step 6 – Create Alpha Channel:

Ctrl+left click on the Red channel layer to load selection of those bright areas. Click on Create New Channel to generate an alpha channel and fill it with #FFFFFF.

Using Soft Brush tool of size 100px and color #FFFFFF, paint away the grey background behind the model.

Note: View animation on the left.


Step 7 – Gradient on Model:

Ctrl+left click on the Alpha Channel to load selection. Go to Select > Inverse. Back to Layers tab and create a new layer. Fill the selection with any color.

Right-click on the layer and choose Blending Options. Activate Gradient Overlay and choose the preset Yellow, Violet, Orange, Blue. Set its angle to -45 and scale to 150.


Step 8 – Enhancing the Colors:

Duplicate the model layer and go to Filter > Blur > Gaussian Blur. Set its radius to 3px.

Right-click on duplicated layer and choose Blending Options. Set the mode of Gradient Overlay to Hard Light.


Step 9 – Drawing Lines:

Create a new layer and draw some white vertical lines of various sizes with Pencil tool.

You will need to hold down the Shift key while drawing so your lines will be straight.


Step 10 – Fading Lines:

Go to Edit > Transform > Rotate and set its value to 45.

Using Soft Eraser tool of size 150px, fade the two ends of the lines.

Repeat Step 9 and 10 if you need more lines on your model.


Optional:

Add some texts to complete the design. That’s all! Hope you like this tutorial.

Video tutorial is posted at Vimeo

Click here to view the final image.


My Deviation:

Added on 1st Sep 2008.

I have some free time so decided to do another version of Keeley Hazell and push this coloring effects further by adding in more details.

The basic techniques used are still as above.

Click here to view the larger image at DeviantArt.


pimp my hello kitty car


Preparations:

We will need 3 images here, a car, a Hello Kitty logo and its face.

You can download the Hello Kitty images here.

All rights of these resources belong to their respective owners.


Step 1 – Setting Up Background:

Create a document of size 750 by 550px.

Set your foreground color to #FF84C3 and background to #AE1D51.

Fill the background layer with a linear gradient top-down.


Step 2 – Forming the Floor:

Create a new layer above the background.

Pick the Rectangle Marquee tool and make a selection on the lower half of the document.

Fill the selection with a linear gradient bottom-up.


Step 3 – Extracting the Car:

Crop out your car from its background using the Pen tool.

Click here to understand more about extraction.

Using the Move tool, place your car at the center of the document as shown in the diagram.


Step 4 – Adjusting Colors:

While you are on the car layer, go to Image > Adjustments > Hue/Saturation. Set the Hue to -55, Saturation to 30, Lightness to 0.

Go to Image > Adjustments > Levels. Set the values to 0,0.85,255.


Step 5 – Defining Pattern:

Open up the Hello Kitty PSD file you downloaded earlier. Hide all other layers except for the face and do a rectangle selection around it. Go to Edit > Define Pattern.

Back to your document and create a new layer above the car. Fill that layer with the Hello Kitty pattern. Go to Image > Adjustments > Invert to turn the pattern white.


Step 6 – Wrap Pattern on Front:

Duplicate the Hello Kitty pattern and hide one of the two layers.

While on the visible pattern layer, go to Edit > Transform > Warp. Wrap the pattern to the car front by shifting the square corners. Adjust the positions of the points like shown in the diagram.


Step 7 – Wrap Pattern on Side:

Unhide the other pattern layer and repeat similar technique used in Step 6 for the side of car.

Merge both pattern layers. Use Soft Eraser tool of size 150px and opacity 50%, fade its border to blend into the car. Concentrate more on those area that seem further away.


Step 8 – Adding Hello Kitty Logo:

Erase to reveal the engine cover.

Drag Hello Kitty logo into the document above all layers. Go to Edit > Transform > Distort the logo like seen in the diagram.

Use Soft Eraser tool of 100px and opacity 50%, fade off the left side of the logo.


Step 9 – Adding the Shadow:

Create a new layer below the car.

Use Soft Brush tool with color #000000 and opacity 80%, paint in the shadows.


Step 10 – Adding the Glow:

Duplicate the car layer.

Select the duplicated layer and go to Filter > Blur > Gaussian Blur. Set the radius to 5px.

Set the Blending Mode of this layer to Screen and opacity 50%. You can increase the opacity if you wish the car to look even more dreamy.


Optional:

You can further add a nice background and some glitters to the car.

Click here to view the final image.

Selasa, 15 Juni 2010

flaming hand effect


Preparations:

This tutorial will need to prepare 2 images (fire and a hand).

You can download the fire image here and hand image here.

Fire image is copyrighted by Jason M.
Hand image is copyrighted by Charles-Elie Lathion.


Step 1 – Setting Up:

Create a new file and fill the background layer with radial gradient. The foreground color used is #461800 and background is #210700.


Step 2 – Adjusting Colors:

Drag the hand image on top of the background layer. We call this new layer as hand. Select Image > Adjusments > Hue/Saturation to adjust the color.

Check on Colorize and enter the values shown on the left..


Step 3 – Adjusting Levels:

Select Image > Adjusments > Level and enter the values shown beside.


Step 4 – Cropping the Hand:

Once these are done, crop the hand out from its background. You can do so by clicking on the Add layer mask button while on the hand layer. Then start using Brush tool with a comfortable size (I used 9px) to paint out the shape of the hand.

Some points to note. While on the layer mask, #FFFFFF is used to reveal and #000000 is for removal parts of an image.


Step 5 – Adding Glow:

Next thing is to create a glow on the hand. Create a new layer called glow. On that layer, use the Elliptical Marquee tool to draw a selection around the hand.

Go to Select > Feather it for 30px. Once you got that, fill it with white color. You will get to see something like what is shown on the diagram.


Step 6 – Colorize the Glow:

Set the Blend Mode of glow layer to Multiply.

Right-click on the glow layer and choose Blending Options. Move on to Color Overlay and set its color to be #FFCC00. Also set its blend mode to Overlay


Step 7 – Extracting Flames:

Now open up the fire image and go to its Channels tab. Ctrl + left click on the Red layer and it loads the selection of the brightest area.

Click onto RGB layer with the selection still active and drag the fire on top of the glow layer that we have earlier. Let’s name this new layer as flame.


Step 8 – Touching Up:

Next thing you need to do is to use the Eraser tool of a larger size (I used Soft Round 100px) to remove the excess flame since I just need a small one around the hand.

You can use the Smudge tool to move the fire around so that it appear more realistic.


Step 9 – Change Blend Mode:

Last thing is to set the flame layer to Screen mode. Click here to view the final image.

Hope you have fun there. Cheers.

camouflage dress effect

 
Preparations:
You will need to define a pattern that you can tile seamlessly across the work document. Some nice patterns can be found here.
Open the pattern file you downloaded and choose Edit > Define Pattern, and close the image. When you wish to use the pattern, select Edit > Fill, choose Pattern from the dropdown, and in Custom Pattern select the image you saved as a pattern. Press OK.
Step 1 – Setting Up Background:
Create a document of size 750×550 pixels and apply your pattern to fill it up.
Right-click on the layer and choose Blending Options. Check on Gradient Overlay and apply the values shown in the diagram.
Step 2 – Extracting Subject:
Next thing to do is to extract your subject out of its background. You can use one of the methods listed here.
Place it at the center of the document.
Step 3 – Extracting the Dress:
Duplicate your subject layer and name it as camouflage dress. Hide your subject layer for the time being.
With the Eraser tool, remove the areas outside the dress. You should get something similar to the diagram.
Step 4 – Blur the Dress:
Ctrl-click on the camouflage dress layer to load its outline selection. Add Layer Mask to that layer with the selection.
Go to Filter > Blur > Gaussian Blur with 5px. This is to blur the details of the dress while retaining its sharp outline.
Step 5 – Adding Highlights:
Change the mode of camouflage dress to Screen. You will see the highlights of the dress like the diagram.
Step 6 – Adding Shadows:
Duplicate the tiled background layer and name it as shadows. Place this layer under your camouflage dress layer. Ctrl-click on the layer mask of camouflage dress. Select the shadows layer and add a layer mask to it.
Using the Burn tool with Soft Round 35px, burn the outline of the dress. Then reduce the size of your Burn tool and add some shadows to the area between the skirt and legs.
Step 7 – Show the Subject:
Unhide your subject layer and you shall see her in a nice camouflage dress.
Step 8 – Coloring the Hair:
Using the Polygonal Lasso tool, create a selection around the hair.
Go to Image >Adjustments >Hues/Saturation. Drag the Hue pointer left or right till you get a nice green hair.
Step 9 – Coloring the Wristbands:
Apply the earlier step to the wristband and voila! Click here to view the final image.
Hope you will find this tutorial useful. Cheers.

Minggu, 13 Juni 2010

smoke fadding effect

 
Preparations
We will need a close up image of a model, and also the awesome Smoke Brushes Set 1 designed by Falln-Stock.
Click here to download the brushes.
Click here to download the model image.
All rights of these resources belong to their respective owners.
Step 1 – Setting Up Environment
Create a document of size 750 by 550px.
Use Gradient tool with foreground color #2B2B2B and background #000000, start a linear gradient from the bottom-left.
Step 2 – Adding Clouds
Create a new layer on top of the Background. Set the foreground color to #000000 and background to #FFFFFF.
Go to Filter > Render > Clouds. Set the blending mode of this layer to Color Dodge.
Use Soft Eraser tool of size 300px, remove some parts of the clouds as shown in the diagram.
Step 3 – Cropping the Model
Crop your model out with Pen tool and place it close to the clouds on the left.
Click here to view more methods for extraction.
Step 4a – Creating Smoke
Duplicate the model layer and use the Rectangular Marquee tool to select the right half of the duplicated model.
Go to Edit > Free Transform and stretch the half of model’s face to the right as shown in the diagram.
Use Soft Eraser tool of size 300px, fade off the right part of the stretched image.
Step 4b – Creating Smoke
Go to Filter > Distort > Wave.
Set the Generators to 5, Type to Sine, Min Wavelength to 10, Max Wavelength to 120, Min Amplitude to 5, Max Amplitude to 35 and both Scale to 100%.
Select Repeat Edge Pixels under Undefined Areas.
Step 4c – Creating Smoke
Hide the wavy model for the time being and create a new layer on top of it.
Paint a large smoke with color #FFFFFF on the new layer. Position it near to the face as shown in the diagram.
Step 4d – Creating Smoke
On the same layer, paint in more smoke of various shapes and sizes.
Note that the smoke has to be connected or close to the skin for better results.
Step 4e – Creating Smoke
Ctrl+left click on the smoke layer to load selection on its luminosity.
Unhide the wavy model and apply a layer mask on it with the selection. Delete the smoke layer once the layer mask is created.
See the layer shown in the diagram.
Step 5a – Fading Model
Create a new layer above the original model.
Use Smoke Brushes of color #FFFFFF, paint in large smokes on the face of the model on the new layer.
Step 5b – Fading Model
Ctrl+left click on the new smoke layer to load selection on its luminosity.
Select the original model layer and apply a layer mask on it with the selection. Delete the smoke layer once the layer mask is created.
See the layer shown in the diagram.
Step 6 – Apply Outer Glow
Right-click on the original model layer and choose Blending Options.
Activate Outer Glow and set the color to #FFFFFF, mode to Color Dodge and size to 5px.
You can see a nice glowing border around the edge of the face blending with the clouds at the background.
Step 7 – Adjusting Colors
Create a new Levels Adjustment Layer at the topmost and key in the values 40, 0.75, 255.
Create another Hue/Saturation Adjustment Layer above the Levels. Key in the Hue as 190, Saturation as 25 and Lightness as 0.
Optional
You can paint the eyes white to achieve a more mystery feel. Lastly, add some texts to complete the design!
Video tutorial is posted at Vimeo
Click here to view the final image.
   

Prev home